Tuesday, May 20, 2025

Wood Working


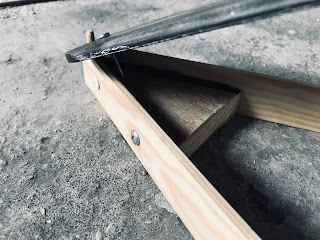
A way ahead of the UK in its thinking ~ understandable given its proximity ~ Germany not only builds drones in materials like plywood, but is building a distributed network of manufacturing sites to supply them in great numbers. The UK policy is importing its needs, which is of course the worst possible preparation for defence and the reason it had to import US assistance wholesale during WW2.

For the figures are astonishing. Between them Ukraine and Russia have deployed some four million drones during the course of the 'special military operation', which eclipses the number of aircraft deployed in WW2 by a very large margin. WW2 effectively gave us aeroplanes as we know them today, and the current conflict could be said to have done the same for drones.

Ukraine purchases as many as 10,000 drones per month from DJI to supplement the 100,000 that some of its factories already produce. Meanwhile Germany's Helsing HF-1 seen above is financed largely by the founder of Spotify, so many of you are involved in one way or another; the author of Linux via which you may be reading these words did point out that all technology conflates military use and entertainment.

The Russia's Molinya (inset) also features plywood and alloy tubing, and is available via Italy as a scale model that you can own for yourself for less than $100:

Neighbour's dog annoying? Take it out with a drone! (Munitions and goggles extra).

Monday, May 19, 2025

Not so SS-UAVe.


... as it appears.

In the video drones emerge from a mothership perpendicular to an airflow of several hundred knots, as gracefully as doves immune to physics emerging from a loft.

They probably figured nobody would notice?

And they won't.

Sunday, May 18, 2025

Wood Works


Seen here at the Hovercraft Museum on the south coast of England, what eventually became of the wood-and-fabric radio-controlled model first tested by the inventor of the first practical type. One weighs 300 tons and could carry 400 passengers and 60 cars... can you guess which?

The overwhelming impression left by a visit to the museum is what can be achieved by inventors, hobbyists or companies with a little wood and alloy along with engines borrowed from elsewhere.

Development of this type of vehicle was funded effectively by the UK government, though the chances of it still funding individual enterprise of any sort are decidedly slim. The two types of uncrewed drones recently flaunted by the PM, for example, were developed by individuals in New Zealand and Portugal.

Within my own lifetime ~ in so far as any form of transport is concerned ~ we've gone from an imperial power supplying the means of locomotion to the wider world, to one being supplied by such powers elsewhere. Drones tho' do upend the game at least for a spell, during which people like you or I may steer things in one direction or another.

Thursday, May 15, 2025

POC #36

There's an alternative template here that allows for a greater choice of airscrews, with a deeper keel and wider deck. See if you can spot which one, for now our work begins in earnest...

POC #35


The 20 x 6" propeller ~ a beautiful piece of German craftsmanship ~ is fitted using a single bolt in the form of the spinner. It's a fine looking vessel, Sir, and no mistake!

Tuesday, May 13, 2025

POC Flotation Test #2

The craft returned to the water after re-fitting the keel with a foam insert throughout. Unladen it provides a surplus of buoyancy that I've never liked the look of, it seemingly dead in the water.

This is solved however by adding a 2.50 kilo battery-pack that sets the waterline about level with the underside of the deck.

The answer going forward tho' is to provide for a keel that can be flooded to a variable extent in order to suit the battery-pack of choice, which will be essential for the POC as I want to run with the lightest pack and so flood the keel to suit the waterline that appears here on the right.

An advantage of the design is that this dead weight of ballast will be released once on the plane, whereupon water in the keel will simply drain away; sustaining the claim of this outline to be the most efficient high-speed craft ever, ever, ever (no backsies).

Sunday, May 11, 2025

POC #34 (retrofit)


I've opened up the keel to add more foam by releasing the ski at the forward end and removing the silicone filet along with the two retaining bolts upon its underside; then afterward reversing the process. With the silicone or adhesive providing much of the support for the ski it's a good idea to set it level as seen here so that it sets overnight with the craft standing true.

POC Flotation Test #1


No excuse really on a day like this not to don waders and get back to the pond, where more debris has been tipped by the locals in an effort to deter youths from carrying out static flotation tests: but I've suffered for my art, and now it's your turn.


Pleasingly the craft floats level, with its motor kissing the waterline... with a few lilies, Monet would have been happy painting this one.


Situation improved by rear-loading the deck with a 2.50 kilo battery-pack that is good for around twenty minutes, the craft looking like it's champing at the bit.


What I have to do now is replace the diagonal (forward-biased) foam in the keel with a rectangular panel that I hope will make little difference here, yet make building easier and reinforce the end result.


Spoiler alert: experience suggests that unladen this will raise the deck clear of the water but settled on one side ~ and look a bit shit ~ tho' I figure with the battery-pack added normal service will be resumed. Don't worry about liquid ingress to the motor, incidentally, as these things run submerged.


The boat weighs 9.50 pounds without the battery and with its C of G six inches aft of datum (the forward edge of the deck.) As the motor produces the same thrust it may be among the few naval aircraft able to accelerate vertically, or at least in theory.


Nice if it works.

POC #33


For those of you who have included biased buoyancy in the form of foam sheet added nearer the forward end of the deck, you will recall that we included a 'blow-hole' for the evacuation of air from the void at the rear of the keel. This hole in the monoski is to allow for the ingress of water upon launch, so as to pitch the craft nose-up at rest.

"Achtung Spitfire! Schnell, schnell... fullen sie die Ballasttanks! 

Wood Work

"MENZ two-blade propellers upto 20" diameter have an 8mm drilled hub, those with a diameter of more than 20″ have a 10mm drilled hub."

And armed with such guidance we can now move on with a choice of wooden propeller (though I recommend not telling people your having a MENZ).

POC #32


The best feature of T-motor's U7 is the fact it has an adapter for conventional props, liberating us from the need to buy carbon-fibre types that are either cheap but have to be sourced from China, or previously imported by dealers who will be caning you.

Multicopters on this scale call for carbon-fibre because they firstly require substantial airframe stiffness so as not to disrupt the onboard flight controller (which I know to my cost) and secondly because they struggle for range and endurance and need every weight-saving measure possible regardless of the expense... another reason that they cost silly money.

A further reason for departing from propellers suited to commercial drones is that they are optimised for hover, which is what most of them spend much of the time doing; whereas the (air)boat we are building is more like a slow aeroplane with a pitch that is adapted to significant forward motion.

This is one reason for instance that the propeller recommend for this 280KV motor ~ 20x6" ~ is difficult to source, because it is too fine a pitch for a propeller of that size fitted to fixed-wing aircraft. The good news is that there is a multitude of propellers of 18" and below in a range of different materials and with a wide range of pitches.

Another reason to avoid propellers for conventional drones is that they come in pairs (clockwise and counter), whereas for cashflow reasons if nothing else we need only one, don't we? And if we do need a spare, it has to run run in the same direction, doesn't it?

It being Sunday morning in the UK, consider that as being the sermon... turning now if you would to your hymnbooks?

Nothing about invention is easy incidentally, and nor is RC as straightforward as it may appear. The U7 adapter provides for a metric 6mm drive-shaft but comes with a collet that allows fitment of a prop with a 5/16" (8mm) centre-hole. Large propellers may come with a 10mm centre-hole or else none at all... drill these yourself at your peril.

Saturday, May 10, 2025

Prop Swap


There is a time in the life of every father and son when you have to sit down and say, 'We need to talk about propellers'.

Accordingly the basic facts are up there for you to print off and discuss with friends behind the bicycle sheds, but here are a few pointers for when it comes to fitting out our (experi-) mental maritime drone.

Longer wings are more efficient. Swifts for instance have relatively long and thin wings and they never need to come to ground, sleeping and having sex in flight, which I had thought only airline pilots could do.

As propeller blades are rotary wings it follows that the larger the blade and the slower it's rotation the less energy they require to produce the same amount of lift (or thrust if we're talking forward motion as with the boat). A helicopter is up to twenty times as energy efficient as a VTOL jet in the hover, which is why jet-packs for people will only ever be rich-boys toys.

Turning to motors, these have a KV rating that specifies the RPM per volt and ours are the slowest of the three available for that model. Looking at the recommendation on the handout, you can see that the slowest motor is paired with the largest propeller at 20". Turning a smaller propeller faster produces more thrust, but there is a sweet-spot at which the motor is best matched to voltage and propeller, and that is using the 18" instead of the 16" propeller.

We have as drag-racers say, however, 'race what few brung' and in our case it is a 22" carbon-fibre propeller, a 280KV motor and a 22.2V battery-pack. What we have also brung, however, is a boat with only 10.5" clearance from the motor axis to the monoski and therefore we have to swap the 22" carbon-fibre propeller on hand for 18" or 20".

Given the 20" provides the greater thrust (four kilos instead of three flat out, albeit off the back of 24V) then we may as well run with that?

Given too that the prop will penetrate the waterline in part at some stage, that rules out carbon-fibre whose properties ~ like the price ~ are rarely forgiving. Anyone who knows me, too, will know that I don't want to steer further revenue toward the same people who supply ESCs and motors that are not easily paired.

The happiest takeaway from this is that our motor comes with an adapter to suit regular RC props that simply screw on with a single bolt, the way wheels on sports cars used to back in the day. This in turn opens up a plethora of options in terms of propellers on the market, all of which (like that pictured) are four or five times cheaper than carbon fibre too.

Nicks in alloy props can be sanded out, whereas carbon-fibre propellers have to be thrown away... we call it progress, which is why the planet will be here long after we've gone.

Wednesday, May 7, 2025

POC #31


In lieu of a cleat at the bow I've gone for a rubberised electrical conduit-clip, although alternative fitments that work here include a Go-Pro camera or (pictured) a 1:24 scale model of Kate Winslet and Leonard di Caprio... each available from among our merch.

POC #30


Unlike the Titanic's rudder ~ 80' tall and weighing a hundred tons ~ this was altogether easier to raise into position. It's a mock-up made of spare aluminium plate fixed to a length of fibreglass tubing with electrical conduit clips and 4mm pop-rivets. The top end will be fixed to the steering-gear but is held in place here by a two-inch screw. I want the 'throw' of the rudder to extend to nearly ninety degrees so that the boat can be stood on end for storage: one over the Titanic even if the lounges don't compare.

POC #29


Here's a view of the lower bearing for the rudder-post. Don't be tempted to grind any excess off while in place like I did because the 6mm bolt will get hot and melt the ski.

POC #28


Here's the reason for that one-inch (25mm) overhang at the stern, because the ski will support the lower end of the rudder-post. I'm pleased we've got one of these, because no vessel is complete without one: the Titanic's post was operated by steam-powered steering engines, but I'm hoping to get away with an electrical servo.

POC #27 (retrofit)


And here's why: I've dropped a 'snubber' in the form of a 6mm bolt into that space so that the front end of the ski is held in place whilst a 40mm screw is driven through to connect with the hub. All of these will be snap-on fixtures in the fulness of time, with IKEA eating their hearts out. Leaving the snubber in too will ensure you never have to ask your co-pilot for that HYDROSKI Severe Damage or Separation checklist.

POC #26 (retrofit)


I've re-done the hub and at the same time dropped it a little to match the fact that at the rear the laterals stand proud by a quarter-inch (5mm). Leave a void at the apex for the subsequent step.

POC #25 (retrofit)


I used 'pre-loved' 25mm timber spars as laterals, and here I've decided to swap these out with 6 x 34 x 2400mm spars from Cheshire Mouldings (product TM681 for those in the know)... reason being that as with elsewhere on the craft there's a lot to be gained from a sliver of silicone or adhesive in terms of doubling up on the fixture of parts.

These are fitted off-centre so as to provide a lip along either side of the deck where a filet of silicone can be applied. Adhesive is many times the strength of silicone, but is an irreversible join for one thing and around twice the weight for another. Either way it should be applied with laterals disconnected from the hub and set vertically so as to prevent them from flexing, and for a really close fit you can pinch the laterals as here. 

Sunday, May 4, 2025

POC #24


With the craft inverted and ideally benched, apply a filet of silicone or adhesive at the junction of the keel and ski, on both sides. I've used silicone as it is easily removed if I should need to open up the keel to alter its buoyancy.

POC #23


With it weighted some more, slide the key forward to obtain the required flexure and measure off the tail level with the rear of the deck viz. 1" or 25mm beyond the keel.

POC #22


Loosely fit the front the ski with its remainder weighed down on the keel's underside.

POC #21


Using your 'laser levelling' equipment to check the bow runs true, fix the hub to that lateral that has already been cut to length and rig up the other before connecting it.

POC #20


Open the template out a little to make it easier to work with.

POC #19


To fashion a hub at the prow, spec the angles out on a length of timber.

POC #18


The curvature of the monoski can be adjusted in any of three ways:

    (a)    by adjusting the stiffness along its length by artificial means

    (b)   a wedge at the prow which adjusts the angle of projection

    (c)    by adjusting the dimensions of the craft generally

I am going for the easiest option of the three and altering the length of the craft as it appears currently. The deck is 24" wide and 26" long and I want the overall length to be around two and a half times the length of the deck.

To enable this I reduce the length of the laterals to 67" or 1700mm and the reason this measure is two inches (or 50mm) over is that these will be lost to the curvature of the prow.

POC #17


Bolt the laterals to the forward spar prior to attaching it to the deck.

POC #16


Use a laser level or ~ as here ~ a joint in the floor to tee up the laterals.

POC #15


Affix the end of each lateral to the rearmost spar using the means of your choice.

POC #14


Rivet or screw the rear spar in place, depending on whatever floats your boat.

POC #13


Here's what I mean... 3mm holes drilled 30mm apart through the spar to secure our motor, of whichever size, without special brackets that hobby shops will cane you for. And to save on loctite I've used a strip of sellotape instead because we're not building Boeings here (Ed. maybe they do?).

POC #12


It's time to fit the motor, and to do this I use a technique that worked well enough on the multi-rotors that I've designed and built in the past. We'll be using just two of the four bolt-holes on the motor because (a) it's sufficient and (b) it leaves two spare if you strip the threads on these two, which is easily done given the diminutive size of the bolts. Normally these are tiny, and another advantage of driving them through the forward spar is that at least they've got a longer shank (3 x 30mm seen here).

The drive-shaft protrudes on this poorly-designed motor so I'll be using a couple of washers to lift it clear of the spar.